


CalDAV & CardDAV (Debian + DAViCal + iOS + iCal)
A long time ago I installed my own email server, so I can access all my emails from my laptop, my phone or any computer with an internet connection. Now I'm taking a step further in my own little cloud, I want to do the same with my calendar and my address book.
For emails, there are standard protocols like SMTP and IMAP. For calendars there is CalDAV and for address books there is CardDAV (it's not a finalized standard yet). My server is running Debian GNU/Linux, so I would prefer using an Open Source software that is already distributed through Debian repositories.
My choice ended on DAViCal (anyway, there are not much choices available). DAViCal is a CalDAV server with a support for CardDAV in recent versions. It uses PHP on the frontend and PostgreSQL database on the backend.
DAViCal
Installation is as easy as usual:
$ sudo apt-get install davical
But the davical package does the bare minimum. It does not do the basic configuration like creating the user and schemas in the database. Those tasks need to be done manually. At least, if PostgreSQL was not installed on the machine, installing DAViCal installed it automatically has a dependency. The first thing to do is to authorize DAViCal to access the database. To do so, add the following lines in /etc/postgresql/9.0/main/pg_hba.conf before the line with # DO NOT DISABLE!:
local  davical  davical_app  trust
local  davical  davical_dba  trust
This authorize the user davical to connect to the database locally without requiring a password (see the official documentation for more informations and how to secure it a bit better).
Let restart PostgreSQL to take this changes into account:
$ sudo /etc/init.d/postgresql restart
Then the user and the schemas have to be created in the database. DAViCal provide a script for that and needs to be executed with a user who can connect to the database (at this point the postgres user is a good choice):
$ sudo su postgres -c /usr/share/davical/dba/create-database.sh
This failed miserably on my computer with the following message:
createdb: database creation failed: ERROR: encoding UTF8 does not match locale en_US.ISO-8859-15
DETAIL: The chosen LC_CTYPE setting requires encoding LATIN9.
Unable to create database
The reason for that is because my server is starting to be quite old and has an old locale configuration. Everything is explained about this locale problem on debian wiki. Solution:
// Reconfigure locales (when asked, select the ones I need and set "none" as default")
$ sudo dpkg-reconfigure locales
// Comment out the LANG definition in /etc/environment
$ sudo sed -i 's/LANG/# LANG/' /etc/environment
// Reinstall PostgreSQL (barbarian mode ;-))
$ sudo apt-get purge postgresql postgresql-9.0 postgresql-common
$ sudo apt-get install postgresql
And then redo all the previous steps: edit pg_hba.conf, restart PostgreSQL, relaunch create-database.sh script.
For the front-end, you need Apache and PHP (I suppose you already have those installed). In this example, the server will be accessible at calendar.example.com, here is a possible Apache configuration using virtual hosts (in file /etc/apache2/sites-available/davical):
<VirtualHost *:80>
  DocumentRoot /usr/share/davical/htdocs
  DirectoryIndex index.php index.html
  ServerName calendar.example.com
  Alias /images/ /usr/share/davical/htdocs/images/
  <Directory /usr/share/davical/htdocs/>
    AllowOverride None
    Order allow,deny
    Allow from all
  </Directory>
  AcceptPathInfo On
  php_value include_path /usr/share/awl/inc
  php_value magic_quotes_gpc 0
  php_value register_globals 0
  php_value error_reporting "E_ALL & ~E_NOTICE"
  php_value default_charset "utf-8"
</VirtualHost>
Enable the new virtual host:
$ sudo a2ensite davical
$ sudo /etc/init.d/apache2 reload
Go to http://calendar.example.com/, a page saying that the server is not yet configured should be displayed.
Create the configuration file according to the domain name you are using (/etc/davical/calendar.example.com), the only required configuration parameter is the database connection:
$c->domain_name = 'calendar.example.com';
$c->admin_email = 'admin@example.com';
$c->system_name = 'CalDAV & CardDAV Server';
$c->local_tzid = 'Europe/Paris';
$c->pg_connect[] = 'dbname=davical port=5432 user=davical_app';
The web interface is used to configure user accounts and calendars. To connect on it, retrieve the admin password:
$ sudo su -l postgres
$ psql davical -c 'select username, password from usr;'
The password is after ** in the password column for user admin. Go to http://calendar.exmaple.com/, a login page is displayed, use admin as login and the password to connect.
In order to create a user account: click on user functions/create principal.
A default calendar called Home is created for the user but no default address book.
To create the default address book click on User Functions/View My Details/Create Collection:
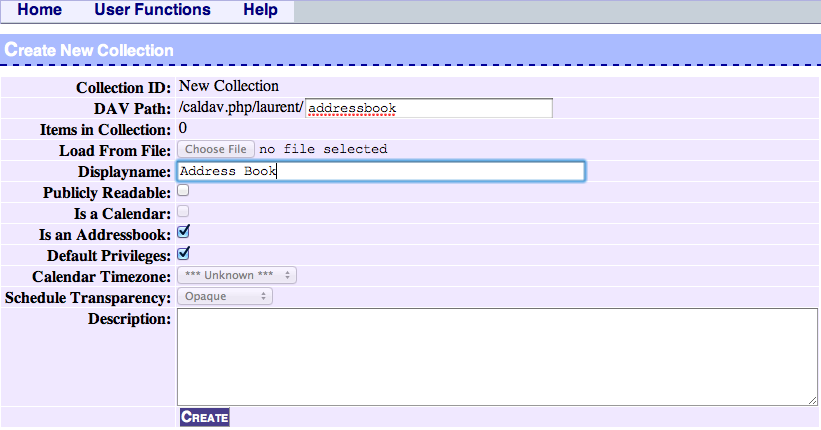
Give the path to access the address book, give it a name, unselect Is a Calendar, select Is an Addressbook, click Create.
That's mostly all for the server part.
DNS
Obviously you need to have created the sub domain calendar.example.com in your DNS. But there is something else to simplify clients configuration if they support it. The idea is that the DNS should provide enough information so that the client can configure itself as long as you provide your credentials and domain name.
We need to things for that. First create SRV records on your domain name to tell where are the CalDAV and CardDAV servers:
_caldav._tcp SRV 0 1 80 calendar.example.com.
_carddav._tcp IN SRV 0 1 80 calendar.example.com.
For HTTPS here are the SRV records:
_caldavs._tcp SRV 0 1 443 calendar.example.com.
_carddavs._tcp IN SRV 0 1 443 calendar.example.com.
The client will try to find resources on well known URLs. Since DAViCal is using different URLs, we need to redirect them in Apache configuration.
Update the previous Apache configuration with the following:
<VirtualHost *:80>
  # (…)
  RewriteEngine on
  # Redirect /.well-known URLs
  RewriteRule /.well-known(.*)$ /caldav.php/.well-known$1 [NC,L]
  # Optionally: redirect /principals/users/ as well
  RewriteRule ^principals/users(.*)$ /caldav.php$1 [NC,L]
  # (…)
</VirtualHost>
Don't forget to enable rewrite module and reload Apache configuration:
$ sudo a2enmod rewrite
$ sudo /etc/init.d/apache2 reload
iPhone
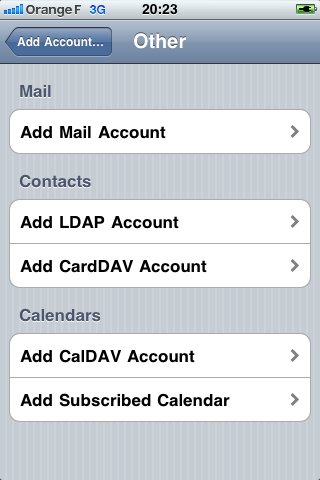
On iPhone, to add your new calendar and address book, go to Settings > Mail, Contacts, Calendars > Accounts > Add Account… > Other:
For the calendar, select Calendars > Add CalDAV Account:
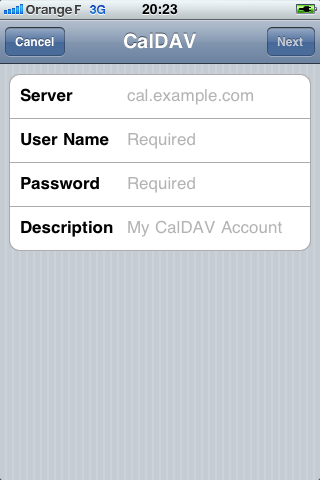
And configure it with the account credentials you created on the server and use something like the following in the server field: http://calendar.example.com/caldav.php
For the address book it's very similar, select Contacts > Add CardDAV Account:
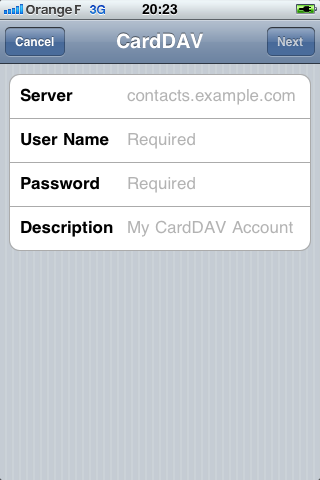
And enter the same things.
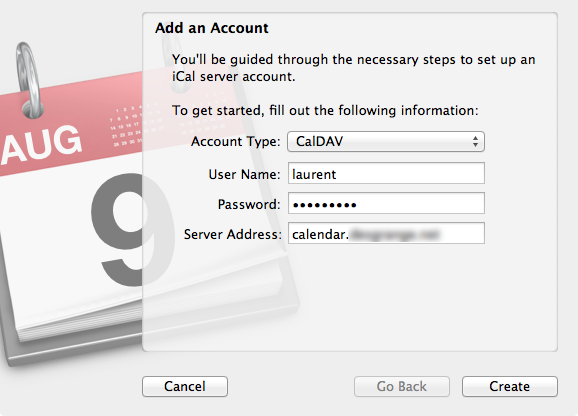
iCal
On iCal, add a new account by clicking on the + button (bottom left) in Accounts tab:
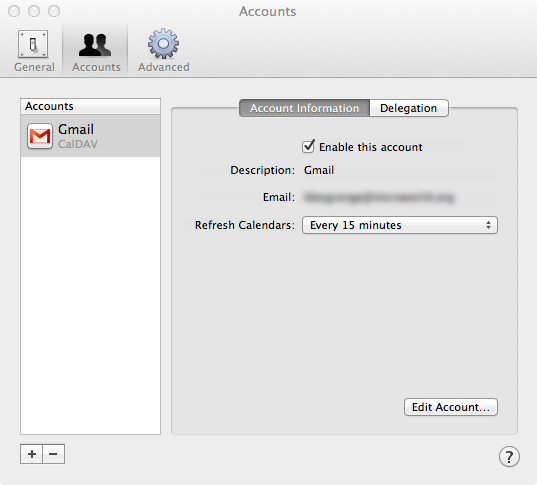
Then fill with your credentials and put somthing like calendar.example.com in the Server Address field.
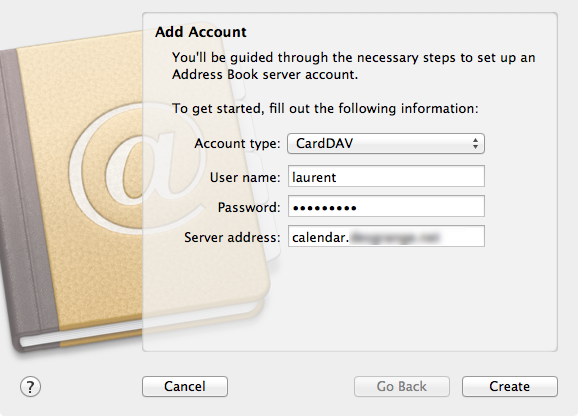
AddressBook
In AddressBook on Mac OS X Lion, everything works fine, but a subtlety on Snow Leopard is that the server port must be specified.
Like in iCal, press the + button:
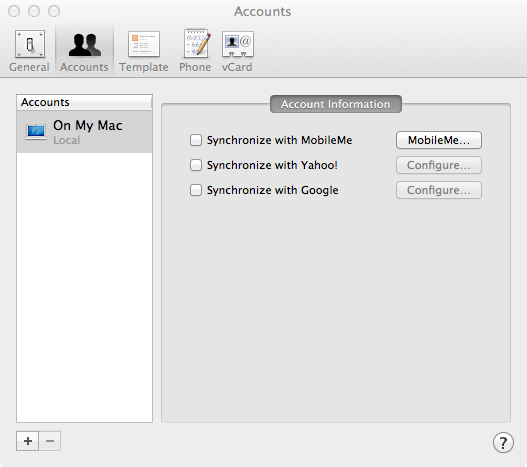
In the Server address field enter something like calendar.example.com on Lion and calendar.example.com:80 on Snow Leopard:
RoundCube
I'm using RoundCube as webmail. It has a built-in address book and I want to use my new CardDAV server as address book. And of course there is a plugin for that.
The CardDAV plugin for RoundCube is available on crash-override.net (I suppose the name is taken from the movie Hackers 😉).
Installing it is quite easy (replace with the appropriate version number, current version is 0.7.0):
$ cd /tmp
$ wget http://www.crash-override.net/uploads/downloads/carddav_0.4.1.tar.bz2
$ tar xvjf carddav_0.4.1.tar.bz2
$ sudo mv carddav_0.4.1 /var/lib/roundcube/plugins/carddav
Activate the plugin in roucube by adding the folloeing line to /etc/roundcube/main.inc.php:
$rcmail_config['plugins'][] = 'carddav';
Then log into RoundCube, a CardDAV section should be available in the settings:
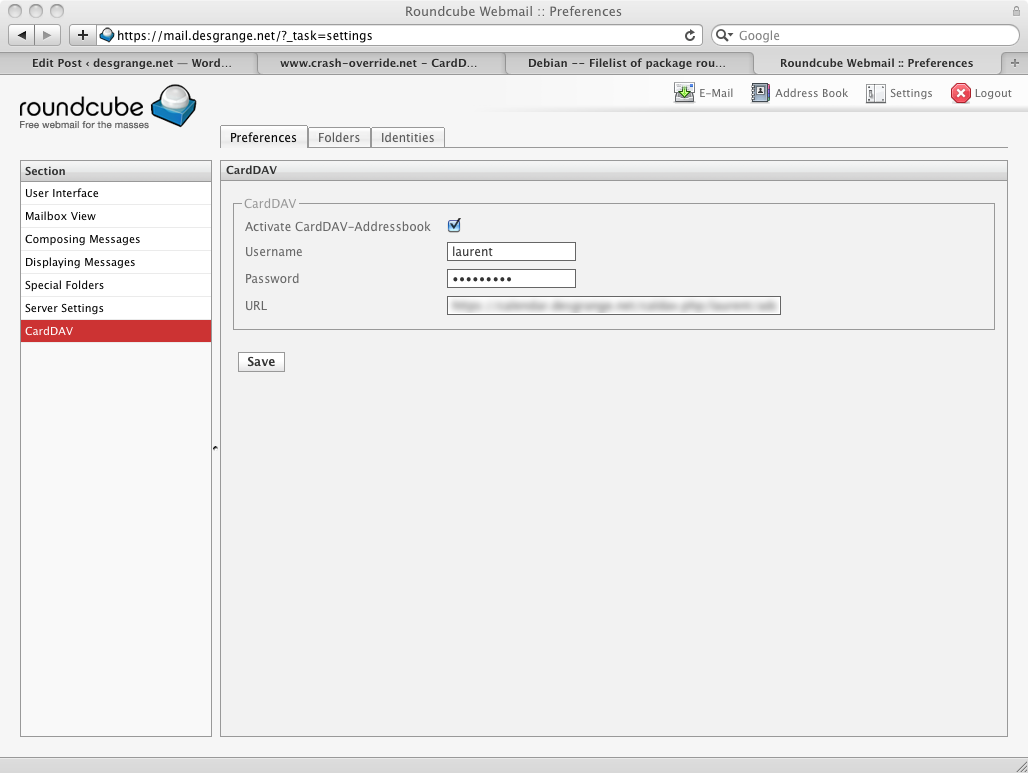
Put your credentials and the full URL of the address book, something like that: http://calendar.example.com/caldav.php/username/addressbook
Now auto completion in To, Cc… fields should complete with matching contacts from the CardDAV address book.
Links:
- http://www.davical.org/installation.php
- http://wiki.davical.org/w/CardDAV/Configuration/Well-known_URLs
- http://xml.coverpages.org/draft-daboo-srv-caldav-05.txt
- http://www.staze.org/carddav-caldav-autodiscovery-on-mac-os-x-and-ios/
Note: I have been using this for nearly a year now and it's still working quite well.


Hello Chris,
Thank you, no I haven't tried and I'm no longer using Roundcube.
Laurent.